Bugger.
Good luck to all the entrants though.
Wednesday, 16 May 2007
Tuesday, 24 April 2007
Nothing much more to report.

Well, this is where I'm at, still stuck because of work commitments. I haven't got around to installing Blender on my Mac at home -- if I had maybe I'd get more done on this.
You can just see that the main body
has the same image/texture map as the front wing -- that's a bit of a cock-up.
I really think I'm likely to miss the deadline. :(
Some people already have their entries in: Clicky
Thursday, 19 April 2007
REALLY busy at work...
Unless I do some of this at home, I'm not going to get it finished. OK, I guess it could go in the 2008 Blender F1 challenge...
Anyhoo, I did these bits ages ago but have only just got round to uploading them:
UV map on the front wing:
An image wrapped onto the UV map

Not done much recently like I say, it's been all go in the office.
Anyhoo, I did these bits ages ago but have only just got round to uploading them:
UV map on the front wing:

An image wrapped onto the UV map

Not done much recently like I say, it's been all go in the office.
Wednesday, 4 April 2007
I've been busy at work recently...
... so unable to work on this.
The deadline is May 12 so i hope I can get some more done soon.

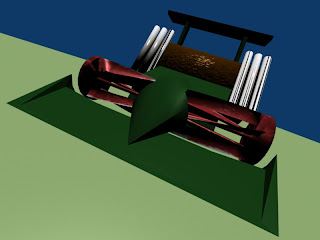
Well I've finished modelling the nose-cone (render above -- just the nose-cone and blades); I'll be starting to texture it now.
The deadline is May 12 so i hope I can get some more done soon.

Well I've finished modelling the nose-cone (render above -- just the nose-cone and blades); I'll be starting to texture it now.
Friday, 30 March 2007
A lot more since the last post
I promised to say how I sharpened the blades; each one had a quadrilateral cross-section; I merely merged the outer pair of points on each quad along each blade.
OK, what have I done since then?

Some smoothing and added surfaces on the nose-cone, as well as a central bar in the middle of the cutter
Started a UV texture for the cutter (based on a tutorial here) -- you can see the UV face edges as paler lines on the red of the cutter.
More detail on the texture
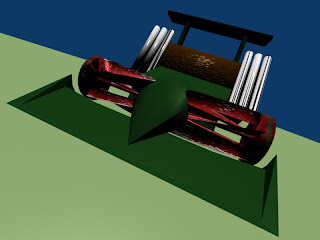
A bump map and some grass-stains added to the texture.
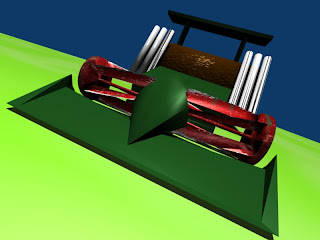
I changed the grass (floor plane) and added an area light for fill-in details
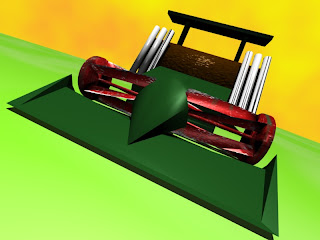
And I changed the "sky" background.
I had plans to do a UV unwrap of the rear roller but two points occurred to me:
OK, what have I done since then?

Some smoothing and added surfaces on the nose-cone, as well as a central bar in the middle of the cutter

Started a UV texture for the cutter (based on a tutorial here) -- you can see the UV face edges as paler lines on the red of the cutter.

More detail on the texture

A bump map and some grass-stains added to the texture.

I changed the grass (floor plane) and added an area light for fill-in details

And I changed the "sky" background.
I had plans to do a UV unwrap of the rear roller but two points occurred to me:
- It's pointless UV unwrapping a cylinder primitive
- I'm going to change it anyway (I can't just have the rear spoiler sticking up as though levitating)
Tuesday, 27 March 2007
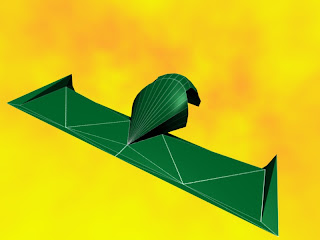
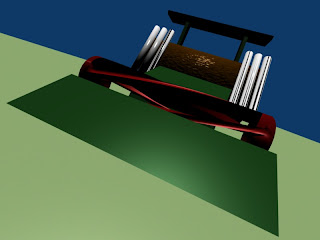
Wing and nose - more detail

More detail on the front wing, including the beginnings of a nose-cone. Now that you can see through the front blades, it's obvious that a lot more work needs doing on the bits behind.
I'm also pretty unhappy with the texture on the rear roller.
I think some sort of sponsors' decals (like maybe the Qualcast logo or similar LOL) on the front wing, a la standard F1 cars.
Edit: Oops I forgot to give this entry a title...
Second edit: I forgot to mention I've sharpened the blades on the red bit. I'll explain that tomorrow cos I have to go now.
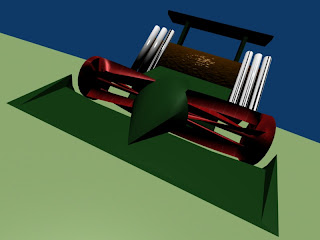
Progressing with the front "blades"
As well as turning the floor-plane a grassy green colour (hey, it's a lawnmower after all) I've started refining the front blades:
Basically, what I did was this:
The end of the blade section is a cylinder modelled with 30 vertices. (Remember that in this post I noticed that there are 5 blades, and 30 divides evenly by 5.)
I took every sixth face on one end of the narrow end-section, subdivided the long edges, and then extruded the faces nearer the circumference. I repeated the extrusion several times until I got to the centre-line, then duplicated and mirrored the whole lot, and basically twisted it all up by selecting groups of vertices and rotating them around the axis of the cutters.
I think I moved the light-source too. It certainly looks that way from the render.
Subscribe to:
Posts (Atom)